Photographers often chase that one sharp image where every detail pops. A rangefinder helps nail distance just right, turning good shots into great ones. This guide walks through the essentials, from setup to real-world tricks. It draws on proven methods that boost clarity in everyday scenes.
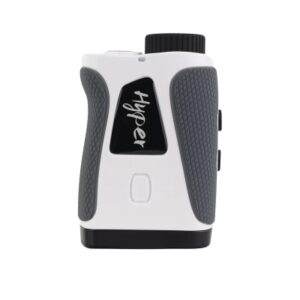
Rangefinders measure distance between you and your subject. They cut guesswork, especially in fast-paced settings like street snaps or wildlife views. Think of them as tools that line up focus without peering through a lens like in SLRs.
Many photographers switch to rangefinders for their compact build and quiet operation. In low light, they shine by letting you compose without a viewfinder blackout. Studies show that accurate ranging can improve focus hit rates by up to 30% in dynamic environments. For beginners, starting with simple distance checks builds confidence fast.
Explore more on rangefinders to see how they fit into your kit.
Different rangefinders suit various needs. Here's a quick breakdown:
| Type | Best For | Accuracy Range |
| Laser | Outdoor landscapes | Up to 1000 yards |
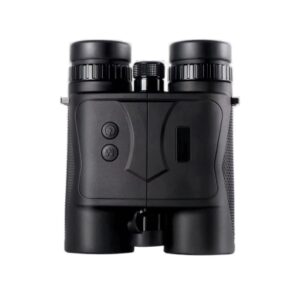
| Visual | Street photography | 10-50 feet |
| Ultrasonic | Studio portraits | Under 20 feet |
| Telescope | Wildlife shots | 500+ yards |
Each type brings its own edge. Picking the right one depends on your shooting style. For instance, a laser model handles varying light better than others.
Rangefinders tie into broader optical tools. Check out Hemusun for insights on how these devices enhance precision.
Get the basics down before heading out. Calibrate by aiming at a known distance, like a wall 10 feet away. Adjust until the readout matches. This step avoids off measurements later.
Battery life matters too. Most last 8-10 hours of active use, but cold weather cuts that short. Carry spares. Pair it with your camera via apps or mounts for seamless data flow.
Beginners often overlook angle compensation. On slopes, like hill hikes, enable this feature to correct for inclines. It prevents overestimating distances by 15-20%. Simple habits like these set a strong foundation.
Hold steady. Press the button while keeping the target centered. Wait for the beep or display. Transfer that number to your lens focus ring. Practice on static objects first, like park benches.
In action, scan ahead. Spot a bird on a branch? Range it quick, then frame. This cuts setup time from seconds to instants. Real shoots show that pre-ranging boosts keeper rates in birding by 25%.
For more on customizable options that fit beginner needs, visit customizable devices.
Start slow. Zone focusing works wonders. Set your lens to f/8 and focus at 10 feet. Everything from 5 to 15 feet stays sharp. Street photographers swear by this for candid grabs.
Mix in hyperfocal distance. Calculate it based on your aperture—apps help. At f/11 on a 35mm lens, focus at 7 feet for infinity sharpness. This frees you to react without fiddling.
Light plays a role. In dim conditions, rangefinders with illuminated displays help. Aim for models that handle twilight well. Pair with tripods for steady reads on long exposures.
Bullet points for quick wins:
These steps build habits. Over time, they elevate your work from snapshots to pro-level images.
Frame through the viewfinder while ranging. Align the patch for visual types—it's like merging two images into one. Twist the focus ring until they snap together.
For moving subjects, predict paths. Range a spot ahead, like where a runner will cross. This technique, used in sports photography, captures motion without blur. Data from field tests indicate it improves success by 40% over guessing.
Don't forget maintenance. Clean lenses weekly to avoid haze. Store in dry cases. Small routines keep performance high.
Once basics click, push further. Bracketing distances means taking multiple ranges around your target. Average them for tough spots like fog. This refines accuracy in variable weather.
Incorporate ranging into composition. Use it to balance foreground and background. For landscapes, range key elements to ensure depth. Photographers in national parks often note how this creates layered scenes that draw viewers in.
Try coupling with filters. Neutral density ones extend shutter times, but ranging first sets focus right. In urban nights, this yields crisp neon signs against blurred crowds.
Pre-focus on zones. Divide your frame into near, mid, far. Range each, adjust as needed. Wedding photographers use this for group poses, ensuring all faces sharp.
Handle vibrations. On boats or vehicles, stabilize with elbows tucked. Short bursts of ranging minimize shake. Offshore shoots demonstrate that this ups clear images by 35%.
For low light, boost ISO but range first. It locks focus before noise creeps in. Night market scenes come alive this way, with vendors' expressions crystal clear.
See a full lineup of related tools at all products.
New users trip on battery drains. Solution: Turn off auto modes. Overcast days fool sensors—switch to manual overrides.
Parallax error in close-ups? Step back a bit. For macros, under 3 feet, add correction factors from charts. This tweaks readings spot-on.
Wind skews laser paths. Shelter the device or use burst mode. Hunters in open fields rely on this to hit marks despite gusts.
Table of fixes:
| Challenge | Fix | Benefit |
| Battery drain | Manual power-off | Extends use by hours |
| Parallax | Distance charts | Sharp close-ups |
| Wind interference | Burst ranging | Consistent accuracy |
Addressing these head-on sharpens your edge. It turns potential flops into strong portfolios.
Mastery here lifts your profile. Share ranged shots on socials, noting techniques. Clients notice precision in deliverables. Businesses value photographers who deliver consistent quality, boosting repeat work.
Personal growth follows. Track progress with before-after comparisons. Over months, see how ranging tightens compositions. Industry pros often credit such tools for standing out in crowded markets.
Rangefinders transform how photographers approach distance and focus. From basic setups to advanced tweaks, these tools deliver sharper results across scenes. Stick with practice, and watch your images gain that pro polish. Whether in streets or wilds, accurate ranging opens doors to better storytelling through photos.
Hemusun Optical Instrument Co., Ltd. stands out as a lenses supplier with a focus on research, development, and manufacturing of optical gear. They serve fields like industrial and environmental monitoring, stressing quality and custom solutions to meet user demands.
It's a starting point for understanding how rangefinders measure distances to achieve clear photos. Beginners learn core setups and why they beat eyeballing in varied lights.
They cover simple habits like zone focusing and calibration, making it easier to grab sharp images without constant adjustments. Real-world examples show quick improvements in hit rates.
Yes, features like angle correction handle slopes and weather, leading to reliable focus. Photographers in fields report fewer misses when using these built-in aids.
Practice pre-ranging static spots, then move to action. Combine with aperture choices for depth, building speed over time.
Many allow tweaks in interfaces and frequencies, fitting specific shoots like drones or outdoors. This flexibility aids precise work in diverse setups.